Home & Garden

Raised Stencil Tutorial

I love the look of a French Chateau! And unfortunately, there aren't any in Big Rapids, Michigan, so I have done my best to get the feel over the years. When I spotted this technique for raised stencils several years ago, I fell in love! I did my research on how it was done and let it simmer for a while.

I wanted our entry to flow better with the rest of our house. Your entry sets the feel for the rest of your house and it's the first thing your guests see. Sometimes, it's the only thing people see. I wanted ours to make a statement.

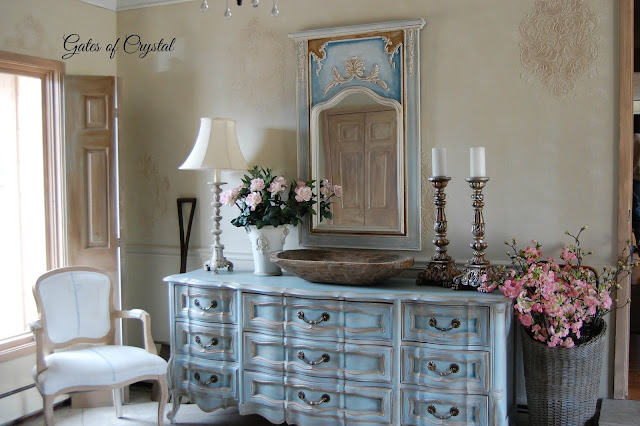
So I started out painting the our white closet doors and trim with the same wood-tone technique that I had done in the rest of the house. You can see the closet reflected in the mirror, the shutter on the window and the trim on the door. Then I went to the walls.

I painted them a uniform Sand by Sherwin Williams - from top trim to bottom, including the chair rail. I experimented with the chair rail being a wood tone and didn't like it so went back and covered my experiment.

And then I paused and almost cried. I truly had loved the old paint technique in the room and now it was just a flat, boring beige. I texted my daughter and told her I may have made a mistake. And then I reminded myself how furniture can sometimes look when you're in the middle of the job and told myself that it will be okay!

The next day I gathered the supplies I had bought for this design and took a deep breath. I marked the places I wanted the stencils to be, basically the same places they had been on the previous design.

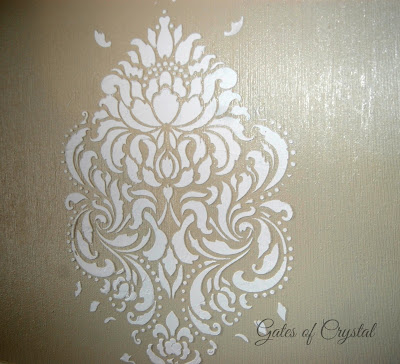
I used painter's tape to hold the stencil to the wall and applied the plaster over the stencil with a small trowel. I got the plaster into all the holes and then skimmed back over it, leaving a thinner, even coat. Then immediately pulled the stencil off the wall.

I believe I bought this stencil from Royal Design Studio several years ago but couldn't find it to link to it. Cutting Edge stencils also has some beautiful damask patterns.
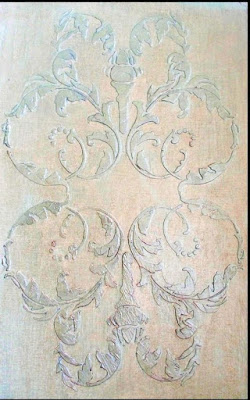
As you can see, there's just a thin layer of plaster. In some areas, because I had to bend my stencil around corners or be up against trim, I got some thicker lumps. I removed some when the plaster was wet and went back when it was almost dry and sanded some down. It was really easy to work with. And the imperfections add to the charm.

I let the stencils dry for a full 24 hours. The next day they were hard and solid. My family panicked a little saying, "You know this is permanent!"  (I've been known to re-decorate.) ;)

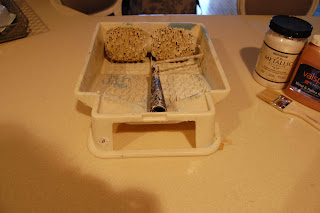
I then used this roller and put Sand by SW in one side and Antique White by Valspar  in the other side and went back over my walls, including the raised stencil to get an uneven look on my walls.

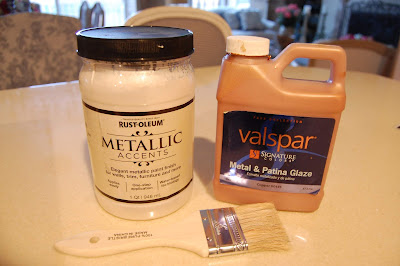
I wasn't blogging at the time so I don't have any more pictures of the process. I then used these products to accent the stencils.

It was really an experiment. Some things that I thought I would like were too dark. Whenever I didn't like something, I covered it back up with Sand. There are about 20 of these raised stencils in the room and each one is uniquely painted. What I mostly ended up with was very little of the bronze glaze and more of the pearl glaze. The stencils become more evident depending on where you're standing in the room and how the light is hitting them.

If I ever get tired of them, a coat of paint the same color as the room would cause them to barely show.

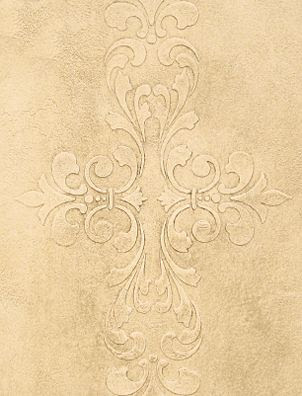
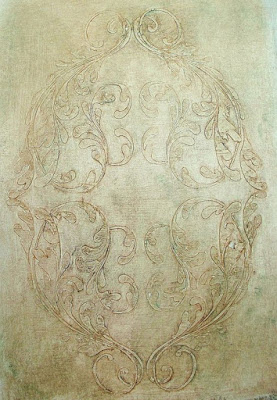
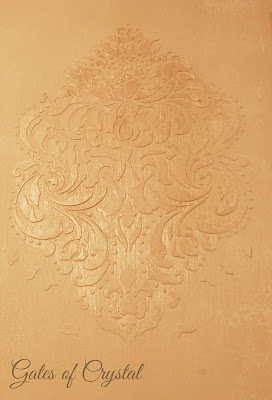
Here are some pictures I found on Pinterest that were my inspiration:


This last picture is a door! And I know exactly the door in my house that I can do this on!

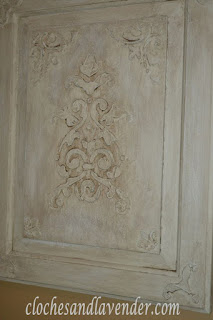
And here's mine. I darkened the color so that you can see the pattern a little better. Our walls are much lighter. And none of my inspiration pictures used a glaze with a sheen to it but like I said, I experimented and that's what I ended up liking.

I think a lot of my inspiration pictures were done on plaster walls (of a French chateau) and that was more work than I could do. So mine is a modern compromise.

I hope this explained the process well. It took me about 5 days to finish this all. One for trim and closets, one for wall base coat, one for plaster stencils, and a couple more days painting all the stencils and finding the look I liked. This is a large room (25x15) and the fun thing is, depending on your stencil pattern, placement and paint, there are so many options to try!

My husband loves it. He got a far away look in his eye in the middle of this whole thing and I asked him what he was thinking. He replied, "I'm worried about all the rooms you could do this in!" 

Poor man! Right now, I'm thinking about that closet door!

love and blessings~


“Everyone then who hears these words of mine and does them will be like a wise man who built his house on the rock.  And the rain fell, and the floods came, and the winds blew and beat on that house, but it did not fall, because it had been founded on the rock. And everyone who hears these words of mine and does not do them will be like a foolish man who built his house on the sand.  And the rain fell, and the floods came, and the winds blew and beat against that house, and it fell, and great was the fall of it.” Matthew 7:24-27

Supplies:
Sponge paint roller
Sand by Sherwin Williams
Antique White by Valspar
painter's tape
stencil
wall plaster
Valspar Copper Glaze
Rustoleum Pearl Glaze

Standard
Home & Garden

Raised Stencil Tutorial

I love the look of a French Chateau! And unfortunately, there aren't any in Big Rapids, Michigan, so I have done my best to get the feel over the years. When I spotted this technique for raised stencils several years ago, I fell in love! I did my research on how it was done and let it simmer for a while.

I wanted our entry to flow better with the rest of our house. Your entry sets the feel for the rest of your house and it's the first thing your guests see. Sometimes, it's the only thing people see. I wanted ours to make a statement.

So I started out painting the our white closet doors and trim with the same wood-tone technique that I had done in the rest of the house. You can see the closet reflected in the mirror, the shutter on the window and the trim on the door. Then I went to the walls.

I painted them a uniform Sand by Sherwin Williams - from top trim to bottom, including the chair rail. I experimented with the chair rail being a wood tone and didn't like it so went back and covered my experiment.

And then I paused and almost cried. I truly had loved the old paint technique in the room and now it was just a flat, boring beige. I texted my daughter and told her I may have made a mistake. And then I reminded myself how furniture can sometimes look when you're in the middle of the job and told myself that it will be okay!

The next day I gathered the supplies I had bought for this design and took a deep breath. I marked the places I wanted the stencils to be, basically the same places they had been on the previous design.

I used painter's tape to hold the stencil to the wall and applied the plaster over the stencil with a small trowel. I got the plaster into all the holes and then skimmed back over it, leaving a thinner, even coat. Then immediately pulled the stencil off the wall.

I believe I bought this stencil from Royal Design Studio several years ago but couldn't find it to link to it. Cutting Edge stencils also has some beautiful damask patterns.
As you can see, there's just a thin layer of plaster. In some areas, because I had to bend my stencil around corners or be up against trim, I got some thicker lumps. I removed some when the plaster was wet and went back when it was almost dry and sanded some down. It was really easy to work with. And the imperfections add to the charm.

I let the stencils dry for a full 24 hours. The next day they were hard and solid. My family panicked a little saying, "You know this is permanent!"  (I've been known to re-decorate.) ;)

I then used this roller and put Sand by SW in one side and Antique White by Valspar  in the other side and went back over my walls, including the raised stencil to get an uneven look on my walls.

I wasn't blogging at the time so I don't have any more pictures of the process. I then used these products to accent the stencils.

It was really an experiment. Some things that I thought I would like were too dark. Whenever I didn't like something, I covered it back up with Sand. There are about 20 of these raised stencils in the room and each one is uniquely painted. What I mostly ended up with was very little of the bronze glaze and more of the pearl glaze. The stencils become more evident depending on where you're standing in the room and how the light is hitting them.

If I ever get tired of them, a coat of paint the same color as the room would cause them to barely show.

Here are some pictures I found on Pinterest that were my inspiration:


This last picture is a door! And I know exactly the door in my house that I can do this on!

And here's mine. I darkened the color so that you can see the pattern a little better. Our walls are much lighter. And none of my inspiration pictures used a glaze with a sheen to it but like I said, I experimented and that's what I ended up liking.

I think a lot of my inspiration pictures were done on plaster walls (of a French chateau) and that was more work than I could do. So mine is a modern compromise.

I hope this explained the process well. It took me about 5 days to finish this all. One for trim and closets, one for wall base coat, one for plaster stencils, and a couple more days painting all the stencils and finding the look I liked. This is a large room (25x15) and the fun thing is, depending on your stencil pattern, placement and paint, there are so many options to try!

My husband loves it. He got a far away look in his eye in the middle of this whole thing and I asked him what he was thinking. He replied, "I'm worried about all the rooms you could do this in!" 

Poor man! Right now, I'm thinking about that closet door!

love and blessings~


“Everyone then who hears these words of mine and does them will be like a wise man who built his house on the rock.  And the rain fell, and the floods came, and the winds blew and beat on that house, but it did not fall, because it had been founded on the rock. And everyone who hears these words of mine and does not do them will be like a foolish man who built his house on the sand.  And the rain fell, and the floods came, and the winds blew and beat against that house, and it fell, and great was the fall of it.” Matthew 7:24-27

Supplies:
Sponge paint roller
Sand by Sherwin Williams
Antique White by Valspar
painter's tape
stencil
wall plaster
Valspar Copper Glaze
Rustoleum Pearl Glaze

Standard
Home & Garden

A Teal Velvet Settee

Hi Friends!

Did you know that the word "friend" that we see in the Word of God is not the same as the way we commonly use it today in our society?  The word "friend" is a term that they used for someone they were in covenant with. When the Bible says that Abraham was a friend of God, it means that he was in covenant with God! 

When I say "friend," I am using it to say, "we are in covenant with each other as part of the Body of Christ!"  I just love that!

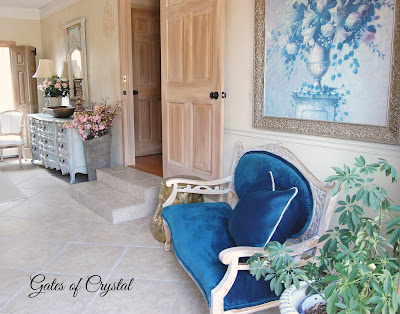
I wanted to share more details of my entry makeover with you, including the other side of the room. 

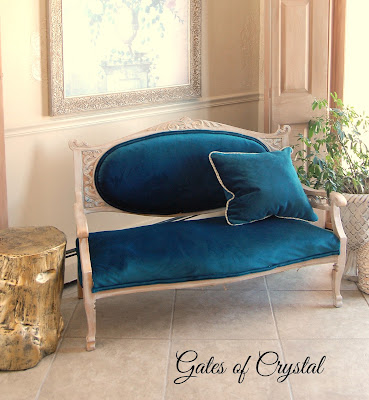
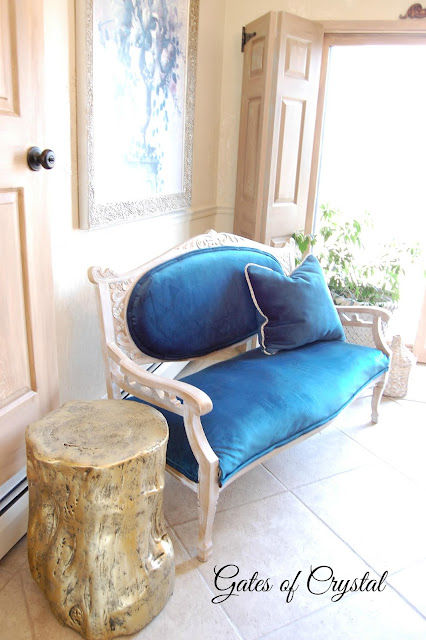
My husband and I bought this antique settee when we lived in Winchester, Virginia about 18 years ago. There was a beautiful little antique shop in town owned by the sweetest man. We were in there one day when I spotted this settee and 'oohed and ahhed'  and stared and sighed. lol  Not very subtle, right? Our anniversary was coming up and my husband suggested we buy it for our anniversary gift. We call it the "loooooove seat."
It was originally covered in an emerald green velvet which I'm sure, at one time,was beautiful. But time had caused it to fade and wear and you could tell it was old. I kept it that way for several years, as it went well with our decor in Virginia, but I've recovered it a couple of times in the last 16 years.

I recovered it this winter in this scrumptious teal velvet. (the actual color is a little greener. I couldn't get it to photograph as true as I wanted.)  This kind of settee is easy to reupholster. I just used an electric staple gun to attach the fabric and then covered the staples with double piping that I sewed myself. You could also use premade trim if you wanted, which would mean no sewing at all!

The art piece behind it was also purchased at a Kirkland's in Virginia. I added this fun little gold stump table for a bit of whimsy. I've toyed with the idea of adding some modern pieces to our house lately. 

Funny story about this gold stump...I was shopping online one day for something fun and whimsical to put next to the settee when I found a very similar gold stump.  I marked it to think about, and come back later to purchase, if I decided I wanted it. Just a few days later, I was in HomeGoods in Grand Rapids with our daughter and one of the first things I spotted when we walked into the store was this gold stump! I promptly put it in my cart and it rode around the store with us until we left with it. 
I ordered this teal velvet on line, which is always a risk, but when it arrived it was even more delicious than I had imagined. I had ordered all they had left and had just enough to cover the settee and make a pillow. I love the dramatic pop of color it gives to this room. I found an almost identical teal velvet home decor fabric at our nearby Joann's Fabric and am thinking about using it elsewhere in our house.

When I painted the blue buffet, I bought a sample-sized paint this same teal color and used it to deepen the color in the corners.


I'll be back soon to give you all the details about the walls. I used a fun technique that I've never done before and it was so easy! Hope you're having a great day!

love and blessings~


 "and the Scripture was fulfilled that says, “Abraham believed God, and it was counted to him as righteousness”—and he was called a friend of God." 
James 2:23


Standard