Home & Garden, Tips & How To

Ticking and Toile and a Photo Shoot with Romantic Homes!

Hi Friends!

Sorry to be gone for SO long! There's honestly been so much going on and I just haven't taken the time to blog it. I will try to catch up!

Staci Dumoski, the editor of Romantic Homes magazine, contacted me a couple of months ago and asked if I would be interested in them sending a photographer to our house for a photo shoot. When I quit screaming, I sent back a very dignified, "Yes! Of course!" Ha!

Now I don't know about you but when you think pictures of your home might be in a magazine, you begin to look around with a very critical eye. Staci told me they planned on photographing our entry, living room, dining room, family room, guest room, master bedroom and possibly the kitchen. (I don't think I've ever had all those rooms looking perfect at the same before!)

About that same time, I spotted a fabric that I loved and that always starts the redecorating process.

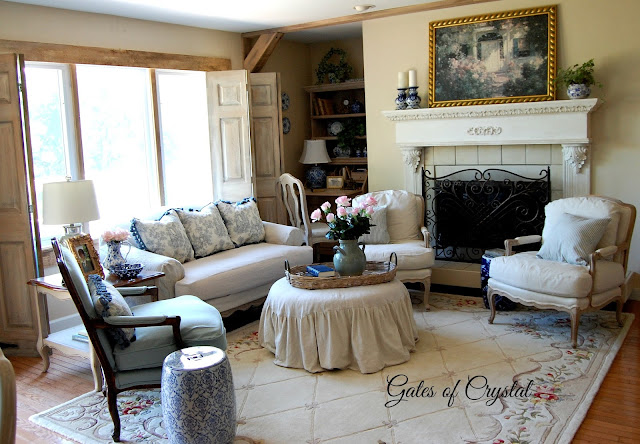
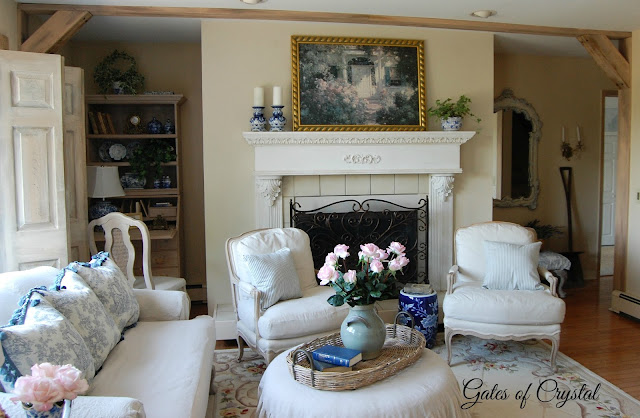
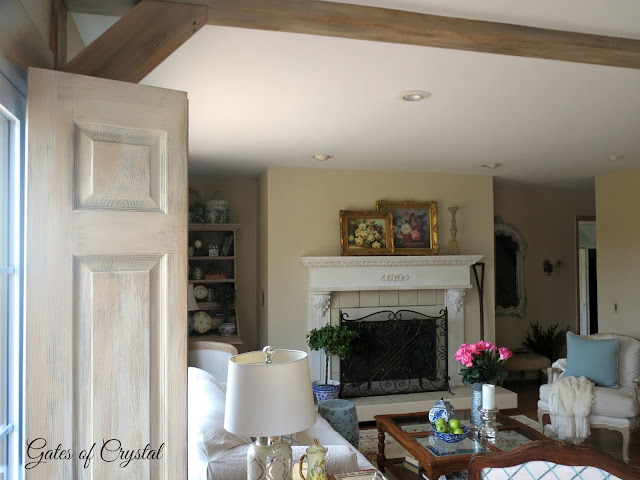
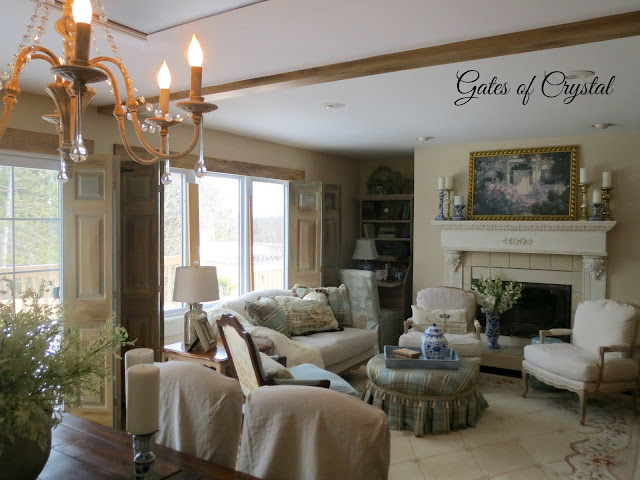
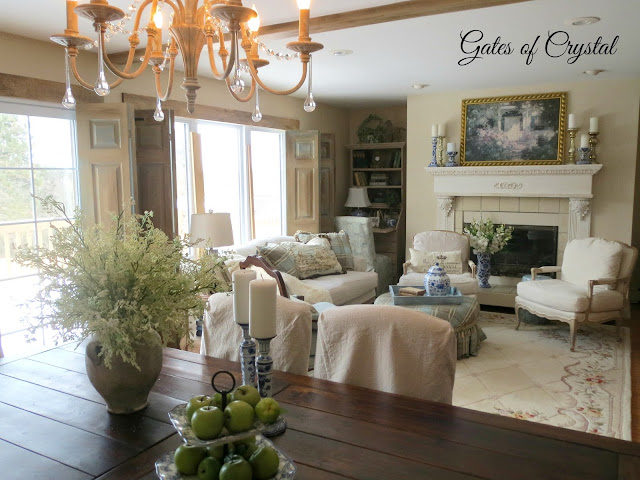
So we started by finishing the beams in our living room. (See how we built them here.) We had made the one closest to the dining room and I was hoping for another one by the fireplace. My husband has been so sweet! We now have two beams!
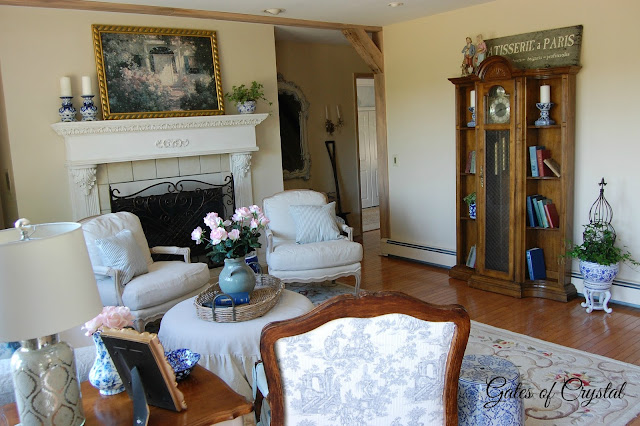
Staci requested that the ottoman be back in the living room and the two chairs be in front of the fireplace. That left a bare wall so we moved our grandfather clock into the room and I love it there! It has been in the entry but now it's found a new home. Thanks, Staci!

I made several pillows with the new blue toile and recovered the back of the blue chair (again!) You can see how I do that here.


I love this fabric! The pattern is stitched on ~ not printed. I got both the fabric and the tassel fringe at warehousefabrics.

I also made a couple of pillows out of a blue and white ticking that I got at warehousefabrics.

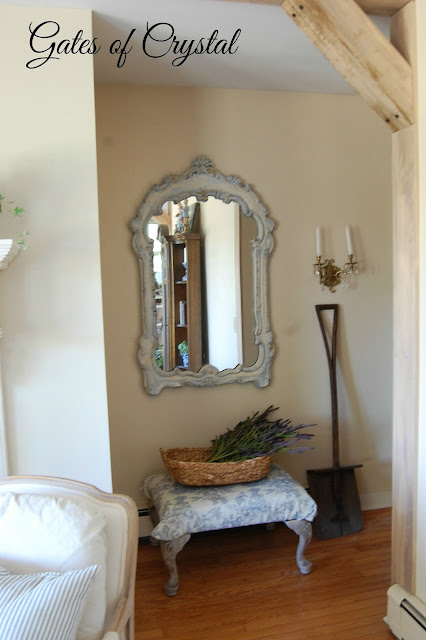
This little ottoman that's been in the entry got recovered with the new toile fabric too.


For those of you who have been following along, I got all my doors and frames painted. They flow well with the beams and faux rustic wood.  I love the way our new beam looks as you enter the room.
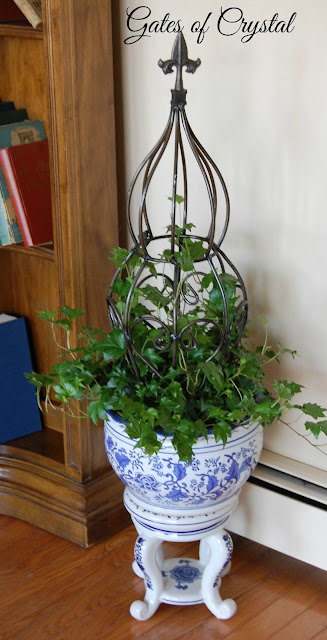
I finally figured out what to do with my little blue and white stand. I got all three of these pieces; the stand, the bowl and the topiary frame, at HomeGoods. This is my new favorite thing! Wait. Maybe my beams are my new favorite thing...or the toile...
Our photo shoot is Tuesday. I'll take lots of pictures of the photographer taking lots of pictures and post them.  I'll also be posting them on instagram.

My son arrives from Boston the evening of the photo shoot and is staying with us for a week. During that week, we'll be celebrating two of our grandchildren's birthdays! Rhynn will be four and Lucas will be one! There's a BIG party in the works! :)

Then before our son leaves, the contractors will be arriving to start the demo on our master bathroom!

So my brain is in a bit of a whirl and I'm a little tired. I'll be cleaning madly tomorrow and running around picking up fresh flowers and a few other little things for the photo shoot.

I'll be back soon to show you the new slipcovers and seat covers I made out of the same ticking and toile in the dining room and the other changes I made for Romantic Homes.

Thanks to the thoughtful ladies that sent me emails and messages checking on me during my absence. You made me feel so loved! I am so blessed.

Love and blessings~

"Behold, I will set your stones in turquoise, and your foundations I will lay in sapphires. I will make your summits of rubies and your gates of crystal, and your entire wall of precious stones."


Standard
Home & Garden, Tips & How To

How To Make Faux Beams

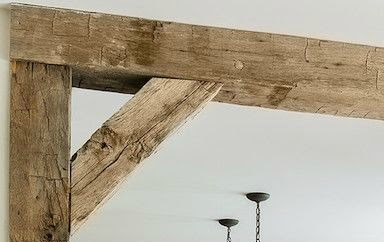
I love rustic beams. I have been bugging suggesting to my husband that we put beams in our living room and family room for years. When I finally painted the existing beam in our living room, that was covered in drywall, to look like wood, he agreed that we could add some more details.

I wanted our beams to do this...

I didn't know what to call it so I showed a picture to my husband.

He never said a word. He just disappeared into the garage and I thought he was cleaning up from what we had just finished. When I went out to check on him, I found him making these!


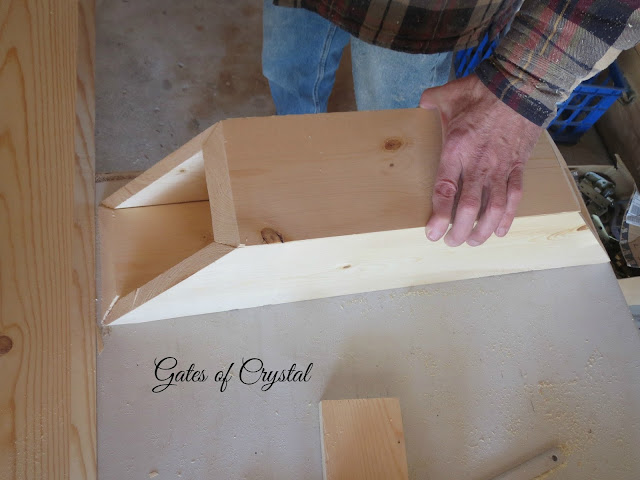
He mitered the sides so that they fit together perfectly and so that they looked like solid beams.
He reinforced them.
And put the lid on them!
He then delivered them to me to be painted. I wanted to paint them so that they would match the faux wood treatment I'd already done in here.


We had already gotten boards that matched the width of the beam on the ceiling. He attached them to the wall...
using big bolts that we pre-painted black.
We did the same thing on the opposite wall - added a board down the wall and attached our faux beam. The black bolts tie in with the black gate hinges on the shutters.
Now I'm bugging  suggesting to him that we need another one on the other side of the room!
We've also recently added some wood trim to hallways and I hope to add some to the wall with the mirror. And I've almost gotten all of our doors painted and will show them to you soon!

You can see more pictures of this room on yesterday's post.

love and blessings~
"Behold, I will set your stones in turquoise, and your foundations I will lay in sapphires. I will make your summits of rubies and your gates of crystal, and your entire wall of precious stones."
Isaiah 54:11,12


I''m joining these linky parties:
Standard
Home & Garden, Tips & How To

Florals, Beams and a New Coffee Table in the Living Room

Happy Monday!

I like Mondays! Everyone else in my family leaves for school and work and I like to help our house recover from the weekend. It always feels good to me to get things back in order.

We had a nice weekend and got to get out in our yard and get some projects started, even though we had some rain.

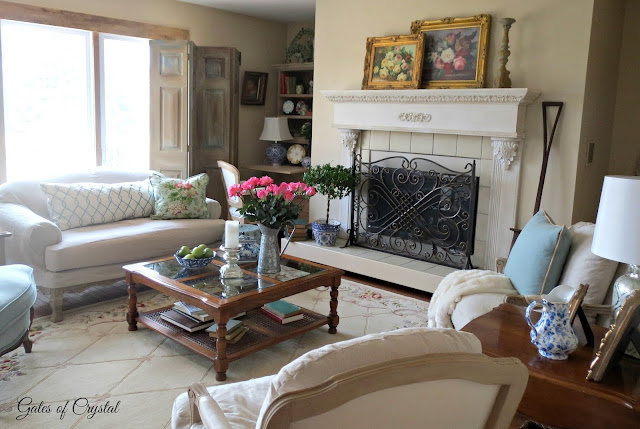
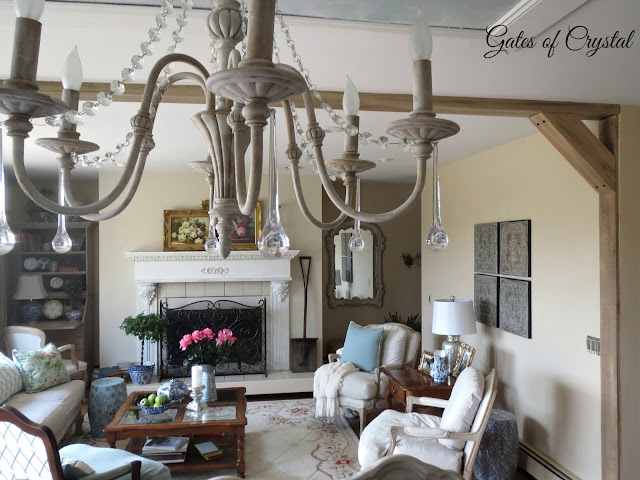
And there's nothing like warm weather to make you want to lighten things up inside! Our living room has gone through several changes over the last couple of years and with Spring making a slow arrival here in Michigan, I thought it was the perfect time to add some florals and color to this room.

Some other things have changed in this room, as well. I found this coffee table on Craig's List. I haven't painted it yet, and probably will soon, but I love that it has the cane lower shelf which matches our new dining room chairs.

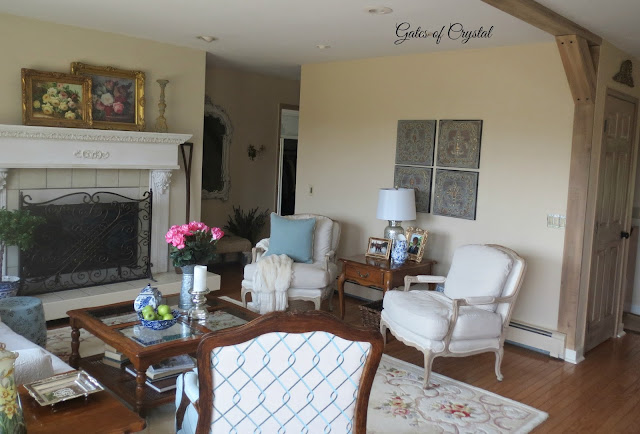
We finally moved our piano out of this room enabling me to put our Bergere chairs up against the wall, which really opened up this space.
I took the toile off the back of this chair (see how I did it here) and replaced it with some embroidered lattice fabric that I bought last year. I made a matching pillow for the love seat and added a small floral pillow.

But my favorite change is our new beams! I will show you how my husband made these in a later post.
They add the rustic feel that I love and balance out all the feminine florals I've put in here.
This is the view as you walk in from our entry way.
The wall you see to your left is our stairway to the upstairs.

My little azalea topiary needs a good shaping but everywhere I started to trim had a new bud ready to bloom, so I'll wait until it's done.
I put two of my favorite framed canvases over the fireplace. You may remember I had the smaller one over the stove and someone kindly warned me that cooking would damage it. I've replaced it with a large floral plate.

Some beautiful pink roses I picked up at the grocery story echo the paintings. I found the antique wooden 'shovel' at a nearby antique shop. It used to hang on the family room wall but I've replaced it for Spring. I found the French candle stick at Tuesday Morning in Grand Rapids. The mirror to the right used to hang in our entry.
I love the new beams and I'm already suggesting to my husband that we need one on the other side of the room. (He doesn't think so.) :)


I'll be back soon to show you how my amazing husband created these beams and to show you some Spring changes in the family room.

Have a wonderful day!

love and blessings~
"Behold, I will set your stones in turquoise, and your foundations I will lay in sapphires. I will make your summits of rubies and your gates of crystal, and your entire wall of precious stones."
Standard
Home & Garden, Tips & How To

Faux Rustic Wood in our Living Room and Dining Room

Hi All!

Sorry to be gone for so long!  I have been writing a lot lately as well as working on our master bedroom.

I've scraped the popcorn off our ceilings in the master bedroom and I have the walls painted.  I'll give you all the details of that when the bedroom is done.  I still have several things to do and was held up waiting for a tool I needed.

So while I waited, I worked on a few small projects. I repainted the shutters in our living room and dining room.  If you remember, they were a French blue.
I also painted the trim above the windows and this support beam that goes across this room, making them look like old rustic wood.  I used two color of brown paint - a tan and a chocolate - and a nifty roller I got from Amazon that creates a wood grain.
I hadn't planned on taking pictures today but the sun came out for the first time in weeks and so I ran around quickly and got a few shots.  I didn't notice until I was done that I have some boards sitting in the window.  I'm planning on cutting some pieces and covering up the wide, white moulding between the windows.  They can't be painted. 


Here's a close-up of the paint treatment on the board over the dining room patio door.  It had been a white semi-gloss.

I first gave it a coat of tan with a brush, then brushed a chocolate brown over that going all in one direction giving it the look of wood grain.  I adjusted the amount of dark brown to get the color I wanted.  When it was dry, I rolled the wood grain paint roller in the dark brown and rolled it down the length of the board. You can see where the roller lifted the paint off in place and exposed the white underneath.  That actually caused it to look more realistic - like the board was salvage.

I did the same process with the overhead "beam."  This support beam is covered in dry wall.

I did the same two tones of paint on the shutters, leaving the blue to show in some areas.
I have always wanted rustic beams in our family room and living room.  For now, we have just one!
I'm in love with all my blue and white again and picked up a few new pieces at HomeGoods.  My daughter has decided she likes turquoise better than the blue and white so we've been trading some pieces.

I love the little bit of rustic feel this gives to our living room now.
That's my favorite thing about French Country - the mix between the elegant and the rustic.


Well, the wind and snow are howling outside.  I'm going to go work on my bedroom ceiling some more.  I hope you're having a wonderful day!

love and blessings~


"He makes the winds His messengers, Flaming fire His ministers." Psalm 104:4

I'm joining these linky parties:frenchcountrycottage
thoughts-of-home-on-thursday
.dwellings
thededicatedhouse
.oursouthernhomesc
coastalcharm
betweennapsontheporch
stonegableblog
astrollthrulife
myuncommonsliceofsuburbia
.oursouthernhomesc
Standard